
This is a rich Chocolate Cheesecake that is made without the oven or gelatine. A chocolate base, decadent creamy chocolate cheesecake filling and layer of chocolate ganache on top, finished with swirls of cream and shower of chocolate shavings to make it look extra special!
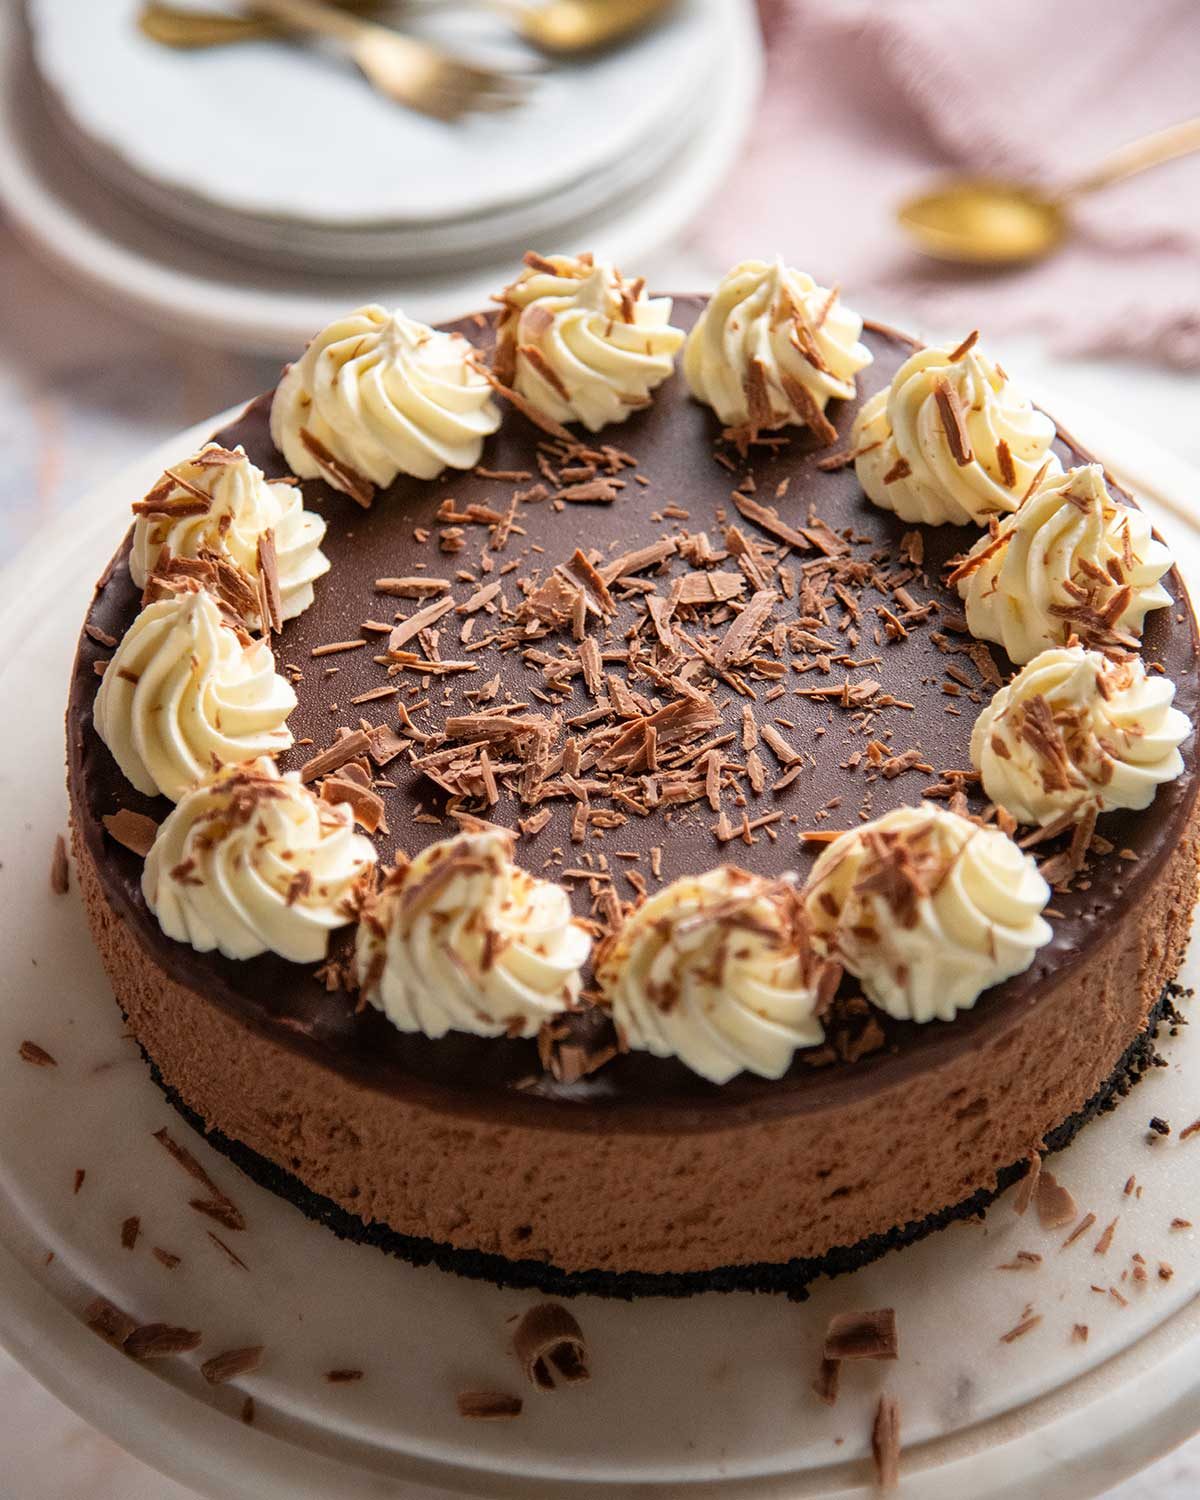
A rich Chocolate Cheesecake
This is not your every day sort of cheesecake. It is very luxurious, with rich chocolate flavour, one to save for special occasions or to treat a chocolate lover in your life!
Though decadent, it’s not too sweet thanks to a restrained amount of sugar and the tang from cream cheese which balances it out. And in even better news for the cooks out there, in the cheesecake making world, this is on the easy end – it’s no bake (no cracked top fear!) and no gelatine, which I know puts some people off no matter how much I preach how easy it is to use and how much better the results are!
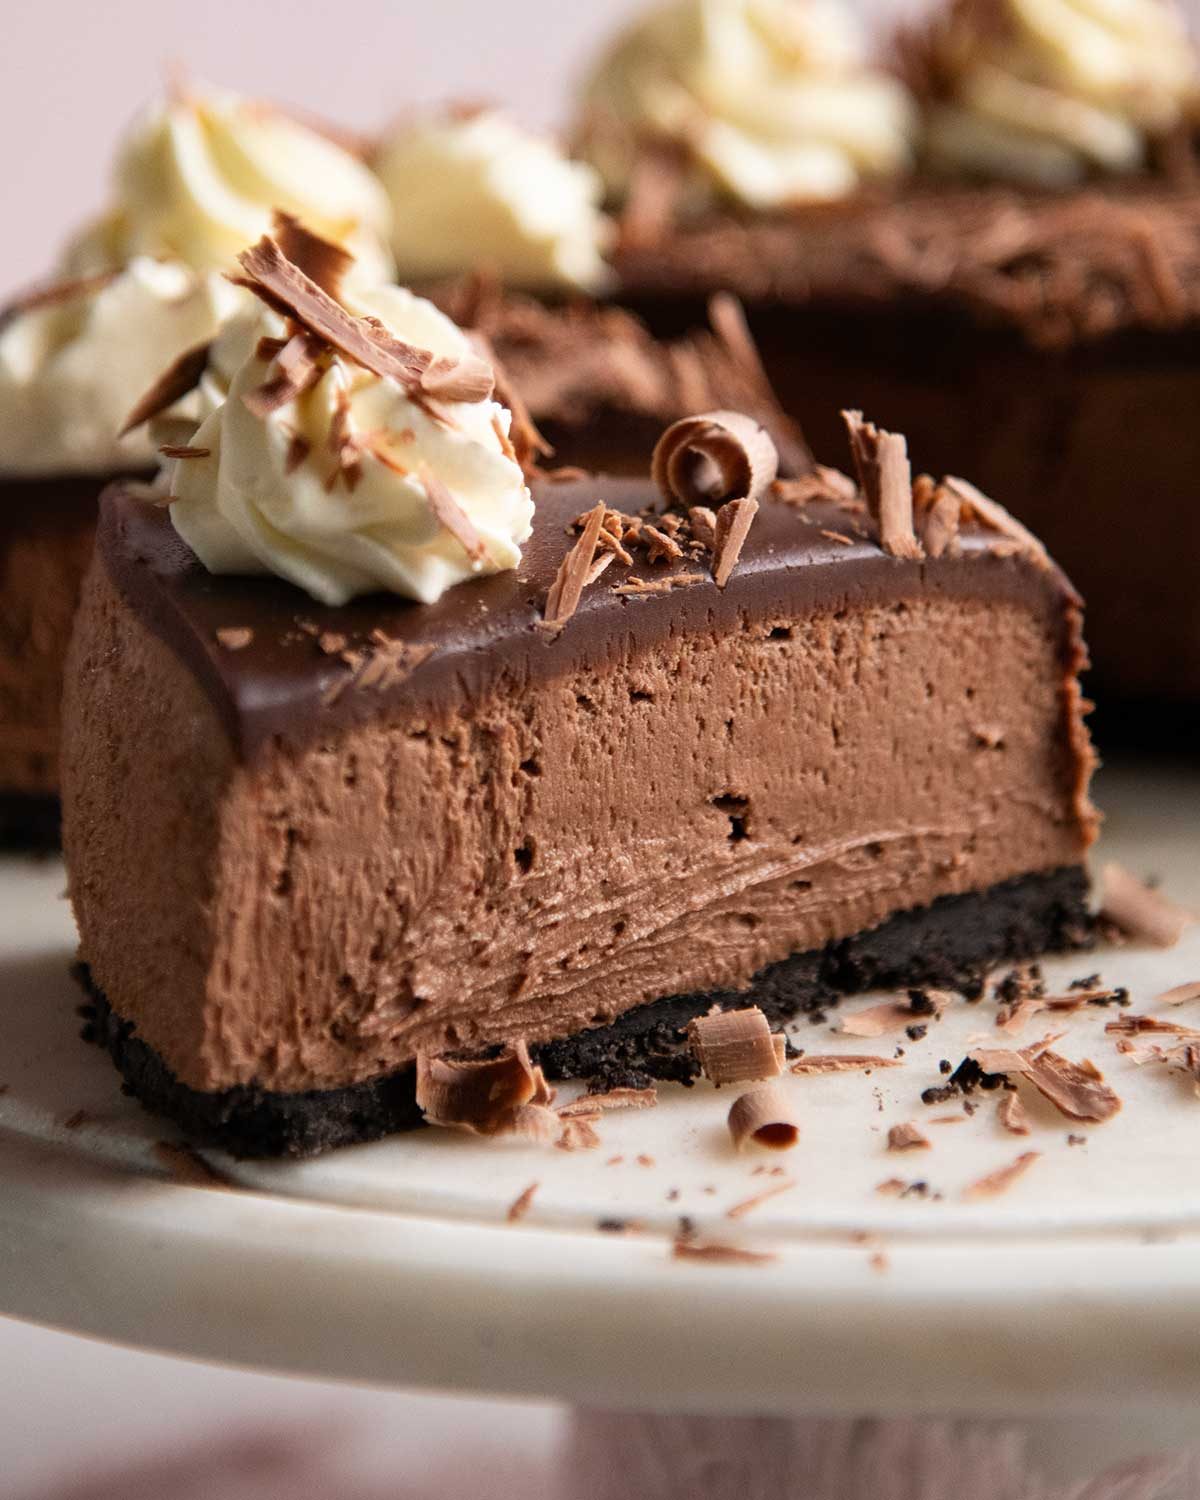
In today’s cheesecake, melted chocolate does the setting work for us – how good is that!!? It firms up the velvety filling as it cools so it slices beautifully yet melts luxuriously in your mouth. Look how neatly it slices!
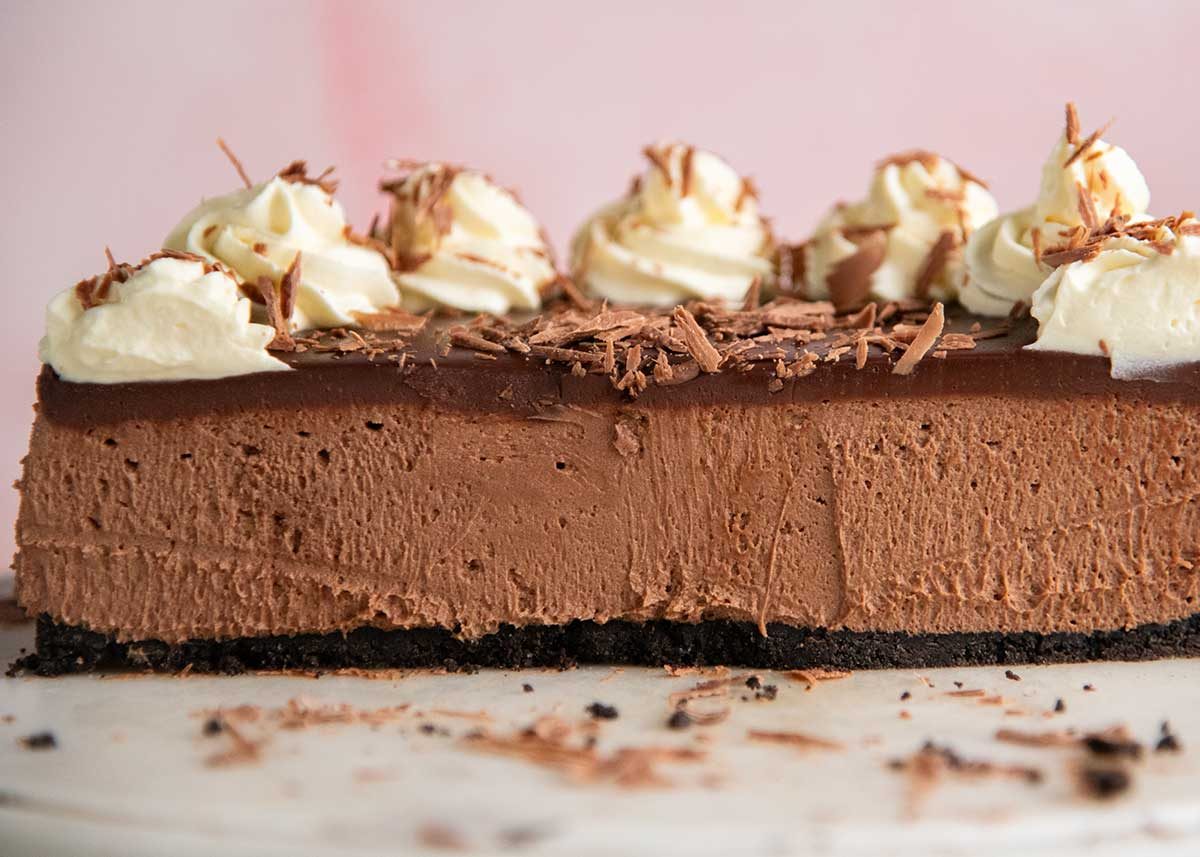
Also a useful photo to give you a breakdown of the cake:
Chocolate base made from Oreo cookies (you can use any chocolate biscuit)
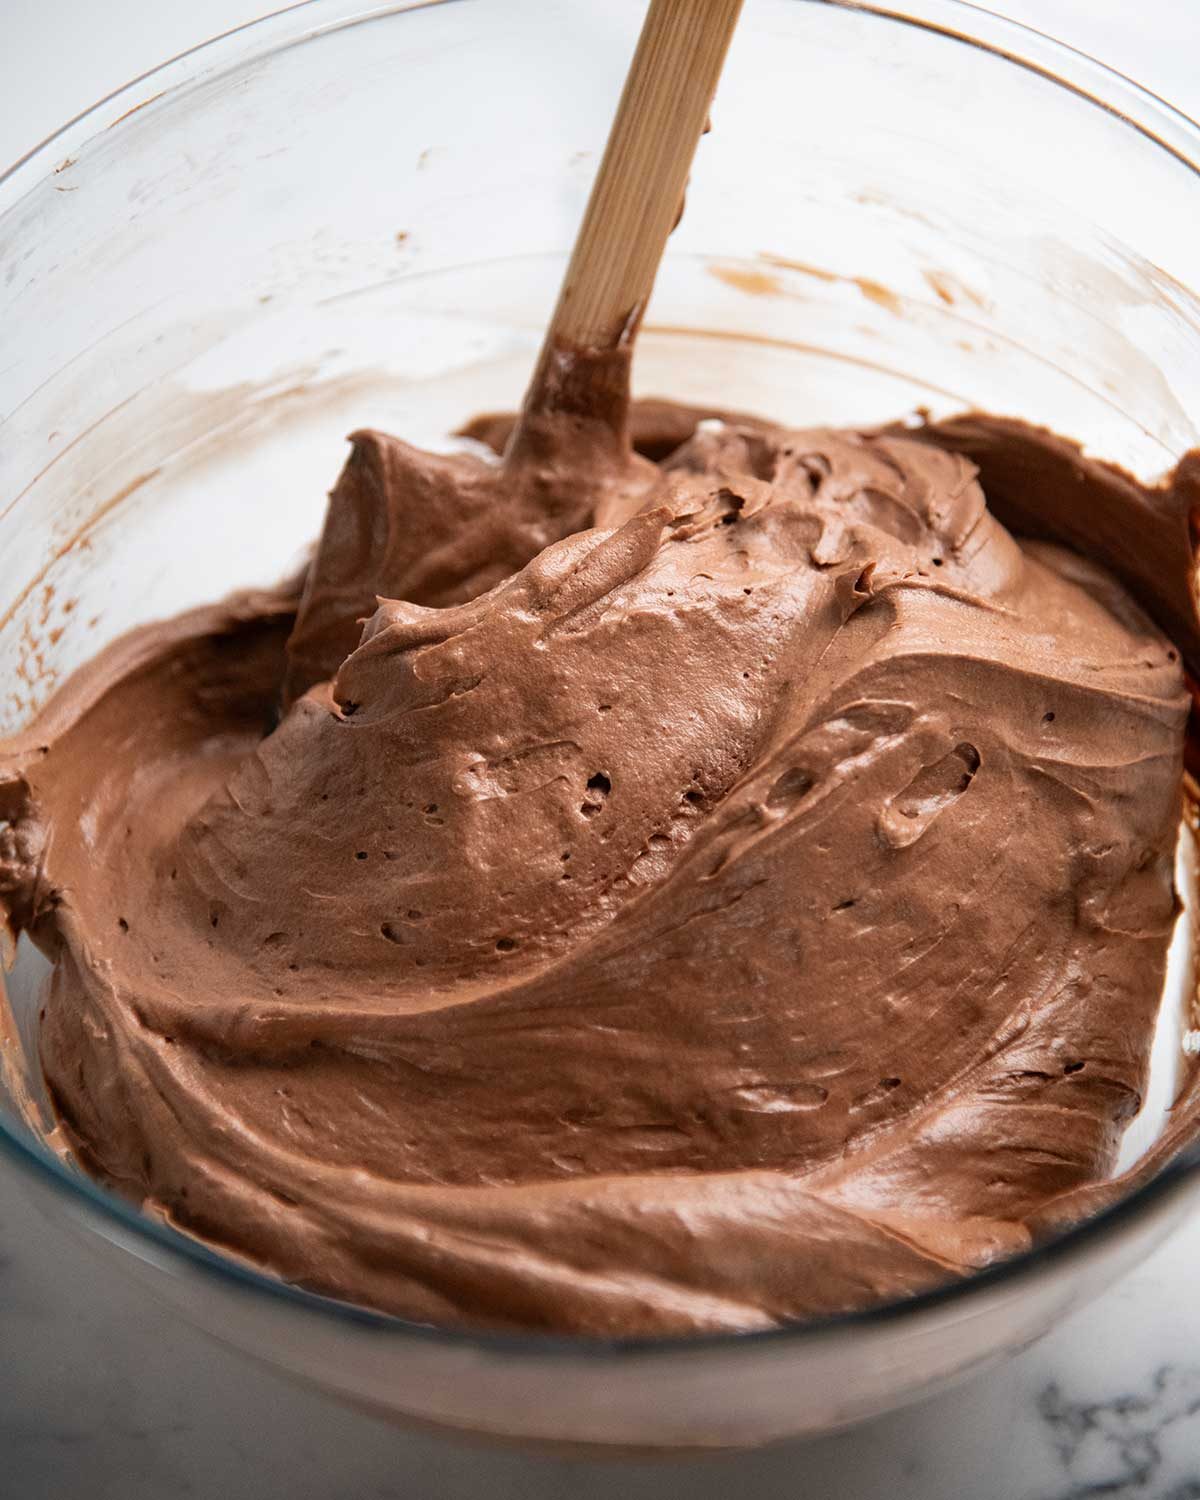
Creamy chocolate cheesecake filling
Chocolate ganache topping
Cream piped around the border
Chocolate shavings
Excessive use of the word chocolate?? Never! 😅
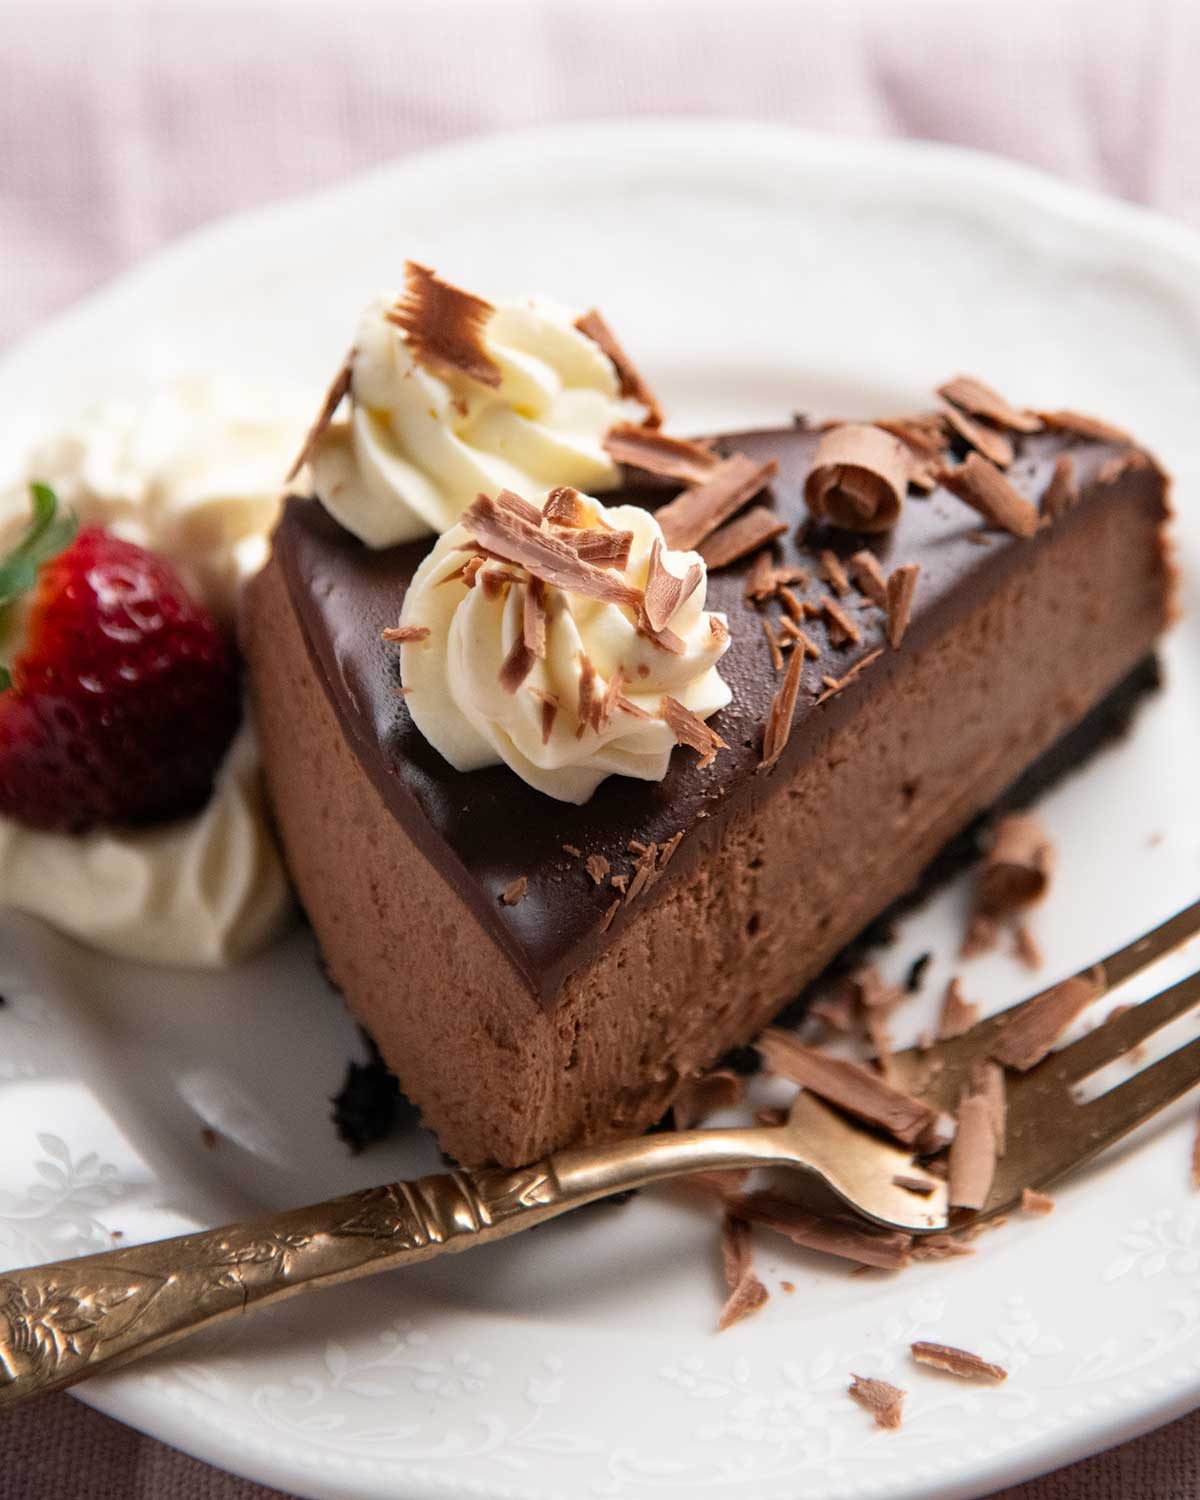
Ingredients in No-Bake Chocolate Cheesecake
This recipe uses both melted chocolate and cocoa powder for maximum chocolate flavour. Using too much melted chocolate makes the filling firmer and denser because chocolate sets solid when chilled, so the cocoa powder gives us extra chocolate flavour without compromising that lovely creamy cheesecake texture. I went through quite a few versions before I got the balance right!
1. For the chocolate cheesecake filling
Important – This must be made with 70% cocoa chocolate in order to ensure the cheesecake filling sets properly. If you use a chocolate with a lower cocoa percentage, the filling will set softer. See below for more chatter on this!
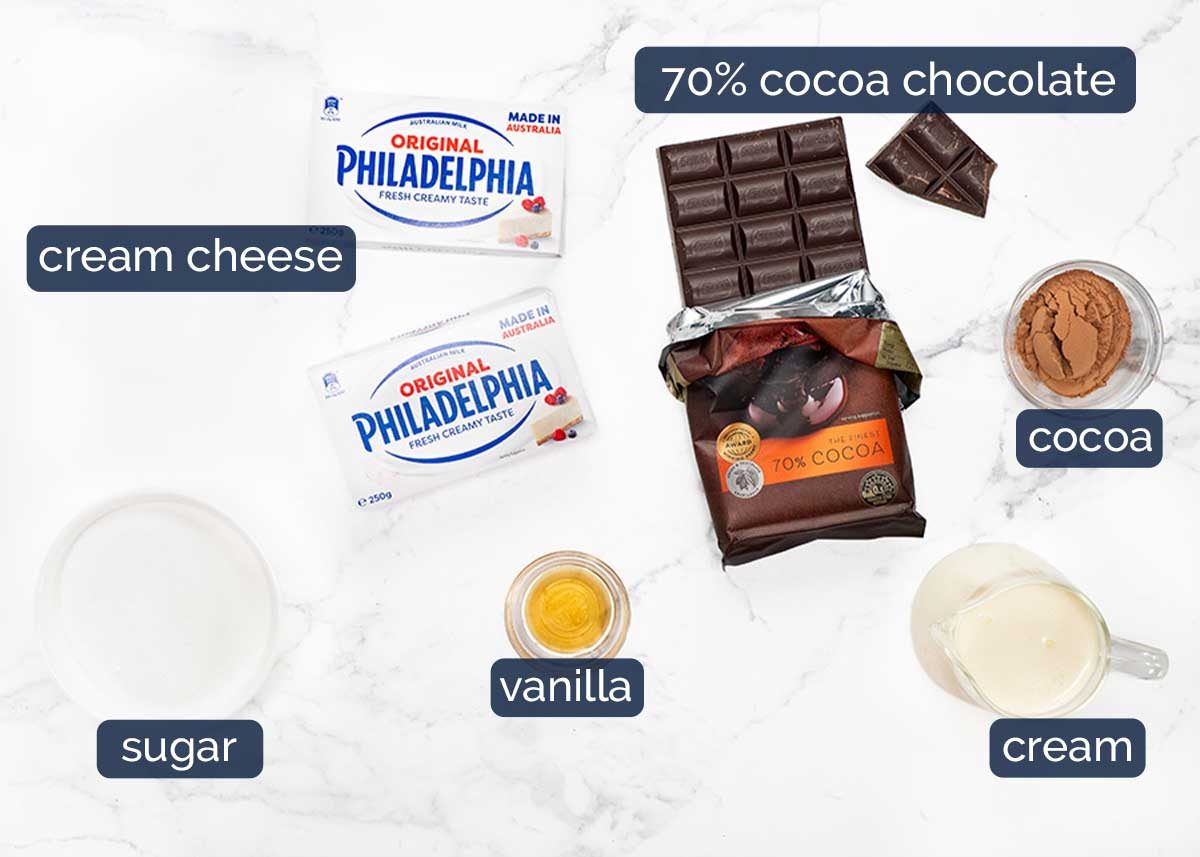
70% cocoa chocolate – As noted above, the cheesecake relies on the chocolate to set (rather than gelatine). Specifically, the recipe calls for 70% cocoa chocolate. I use block chocolate and chop it up to melt. If you have callets or wafers/buttons, you don’t need to chop it.
Important – Make sure to use chocolate from the baking aisle, not the confectionary aisle which is intended for eating and doesn’t melt properly. The only exception I know of is Lindt 70% chocolate – it’s tempered and works beautifully for baking.
Dark chocolate (US: semi-sweet chocolate) – It works, but read this first! With a lower cocoa percentage (typically 40-45%), the cheesecake sets softer, so slices don’t cut as neatly and the edges smear when you cut. And because of the lower cocoa %, the chocolate flavour is not as strong. But it still slices, the taste is great and the cheesecake is extra creamy! So the eating part is great. 🙂
Do not use any milk chocolate or white chocolate. You can use anything between dark chocolate and 70% cocoa chocolate (eg 60%), and the texture will fall between.
Cream cheese – This recipe must be made with block-form cream cheese. It won’t set properly with cream cheese in tubs which is softer because it’s designed to be spreadable.
Spreadable tub cream cheese (ie not block form) – The recipe needs to be altered to work with this, omitting the cream and beating the cream cheese for longer. But it does work, I specifically tried it because I understand from readers that it is difficult to find block-form cream cheese in the UK and many parts of Europe. Instructions are in the recipe card notes.
Cocoa powder – Just regular cocoa, unsweetened, for an extra boost of chocolate flavour. It gets bloomed in a little hot water to bring the chocolate flavour out.
Sugar – Preferably caster sugar (superfine sugar) as the grains are finer to ensure they dissolve easily. However, regular white sugar / granulated sugar should work fine.
Vanilla – For a little flavour. Please use vanilla extract not imitation essence. 🙂
2. chocolate base
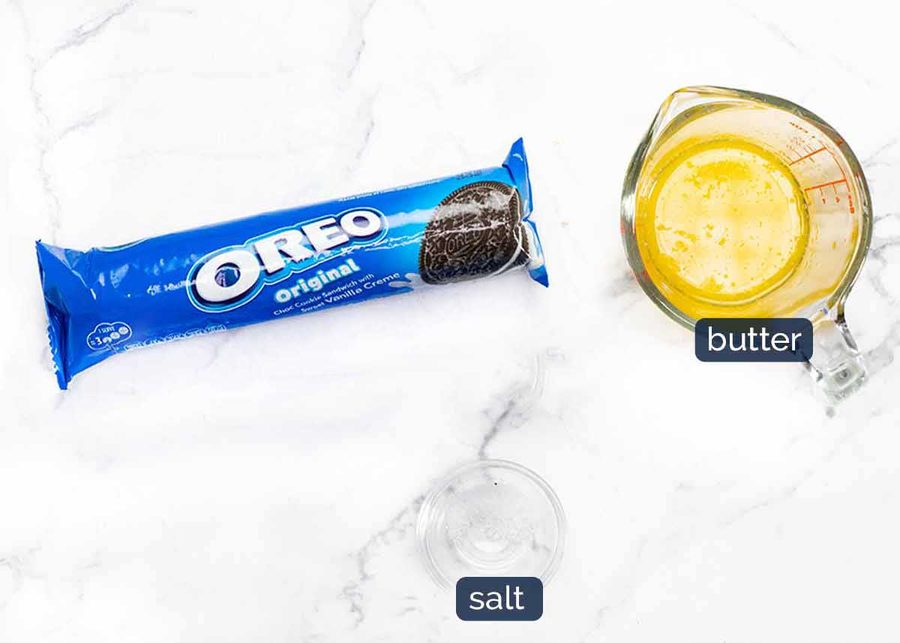
Here’s what you need for the base – Oreos, unsalted butter and a pinch of salt. You can substitute with a plain chocolate biscuit if you want, rather than using Oreos, just add an extra 15g / 1/2 tablespoon of butter to help the crumbs hold together since they don’t have the creamy filling that Oreos do.
3. ganache layer
To make ganache, you only need chocolate and cream – but the type you use matters so read below! Also note the typical 1:1 ratio of chocolate to cream for ganache doesn’t apply here, I’m after a slightly softer set ganache that a knife will slide through effortlessly without pressing into the soft cheesecake.
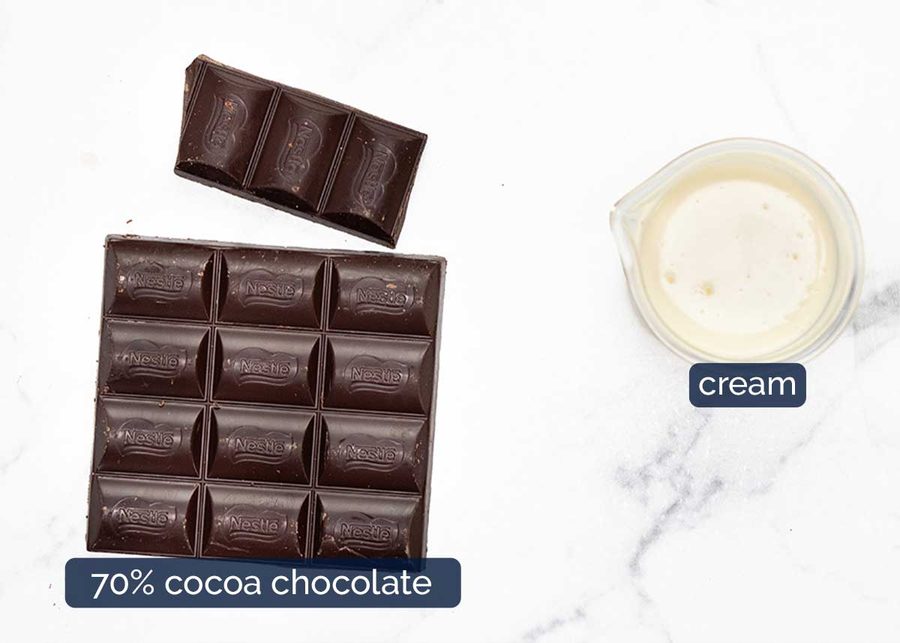
70% cocoa chocolate – I use the same 70% chocolate that I used for the filling. The 70% chocolate blocks I use are 180g each, so I get two blocks and that’s sufficient for the filling and the ganache layer. You can use 70% chocolate in any form – block, callets, buttons – but whatever you use, it needs to be chopped finely so the heat from the cream can melt it.
Also, as noted above, make sure to use chocolate from the baking aisle, not the confectionary aisle (Lindt 70% is the only exception!).
Dark chocolate – If for whatever reason you want or need to use dark chocolate (US semi-sweet chocolate), you will need to increase the amount of chocolate as it’s softer, so check the recipe notes.
Cream – you must use full fat cream that is around 35% fat in order for the ganache to set! If you use low fat cream less than 30%, the ganache will never thicken and you’ll just have a runny chocolate sauce.
Australia – Thickened cream (35% fat) is ideal. Pure cream (typically 35% fat) also works. Don’t use tubs labelled “dollop cream” (too thick, it’s like sour cream) or “cooking cream” (which is just for pouring, it won’t whip”).
US: Heavy cream or heavy whipped cream is ideal (~35% fat).
UK: Whipping cream is ideal – it’s typically 35% fat. It needs to be that fat % to whip. Double cream is too thick.
How to make this No-Bake Chocolate Cheesecake
Cheesecakes always seem to have lengthy step by step photos, but don’t let that put you off! They aren’t overly difficult, they just have more steps than simple dump-and-bake cakes. Just watch the recipe video and read the recipe from start to finish before you begin. There’s no need to rush, and no fiddly precision is required. You’ll breeze through this!
Note: You need to allow at least 8 hours for the cheesecake to fully set in the fridge before slicing.
1. INVERTED BASE (PRO TIP!)
We use a springform pan for cheesecakes so they can be removed without flipping – no cheesecake would survive being turned upside down! For easy removal, turn the springform base upside down – no lip means the cheesecake slides off smoothly without cracking the crust.
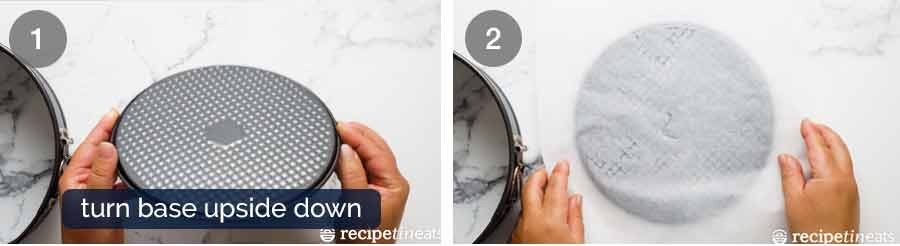
Flip the base of a 20cm/8″ springform pan upside down.
Butter and line – Spray the base with oil or grease very lightly with butter, just enough to hold a square(ish) piece of baking paper (parchment paper) in place so it’s not sliding around when you clip the sides in.
💡Tip: If you grease too generously with butter, it will make the paper stick firmly and you’ll need to run a knife under it to loosen, or let the cheesecake sit out for a bit to let the butter soften before sliding it off the base.
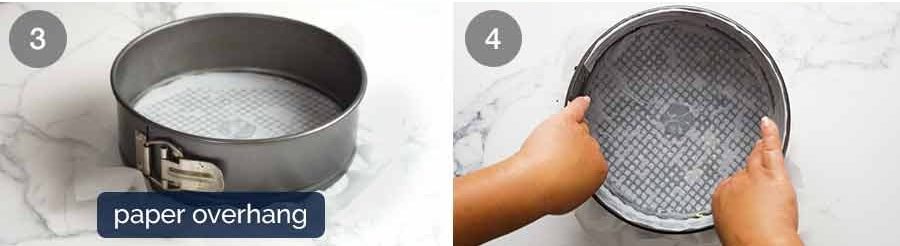
Clip the sides in so the excess paper is sticking out. The overhang makes it easy to slide the cheesecake onto a serving platter – no structural stress!
Line sides – Grease then line the sides as well, making the paper sticks up about 1cm / 0.4″ above the rim, to hold in the ganache which will just about reach the rim. It’s not an especially tall cheesecake, rather, inverting the base raises the base of the cake pan.
2. OREO BISCUIT BASE
If you don’t have a food processor, just put the cookies in a ziplock bag and bash into crumbs using a rolling pin or similar. It’s fun – and therapeutic. 🙂
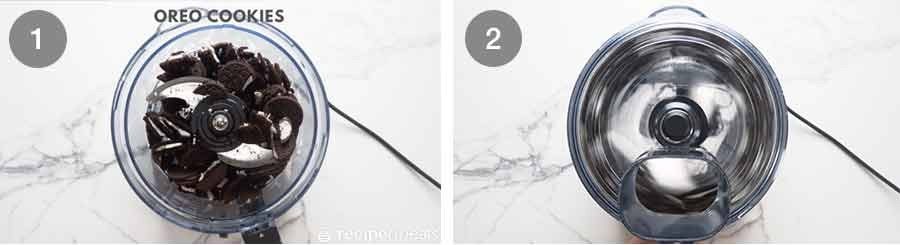
Break up cookies roughly by hand, then place in a food processor.
Blitz until it becomes sand-like. Pour in the melted butter and blitz again briefly to just combine.
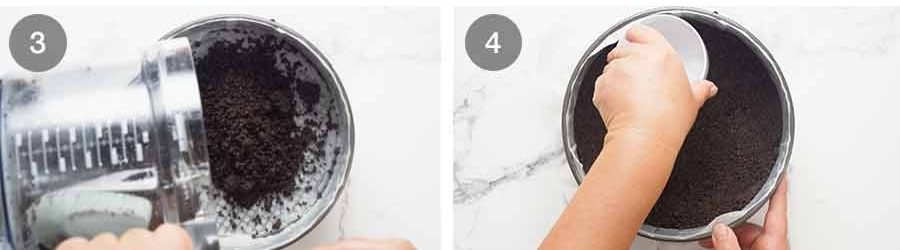
Tip this cookie-sand into the lined pan.
Press into pan – Use something with a flat base and straight sides to press the crumbs firmly against the base of the pan. I use a measuring cup!
3. PREPARE THE CHOCOLATE
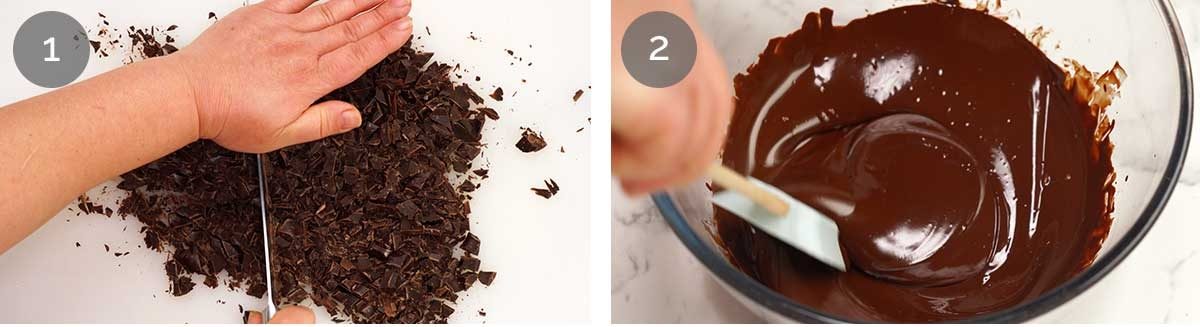
Chop chocolate (if using block) – If using a chocolate block, chop it up until the largest pieces are no bigger than 0.5cm/0.2″.
If using chocolate melts (buttons/discs) or chips, there is no need to do this step.
Melt and cool chocolate – Place the chocolate in a heatproof bowl and melt. I use the microwave – 20 second increments on high, mixing with a chopstick in between – until fully melted and smooth. Or melt in a heatproof bowl set over a saucepan of barely simmering water (don’t let the bowl touch the water). Then leave to cool for 5 minutes – but it must still be fluid, to incorporate smoothly into the cheesecake filling without little chocolate lumps.
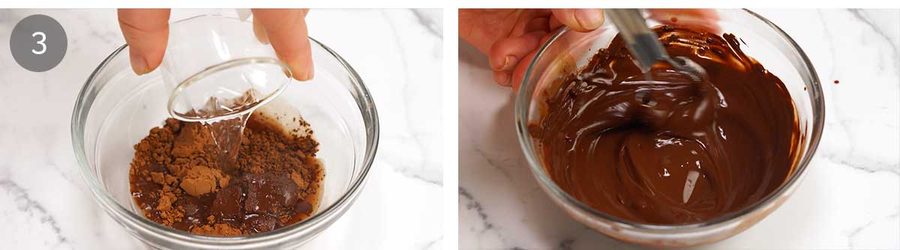
Bloom cocoa – Whisk cocoa powder and hot water until lump-free, then leave to cool and thicken while you make the filling. This is called blooming, which brings out the chocolate flavour. Bonus – no need to sift the cocoa, the lumps whisk out!
4. MAKE CHOCOLATE CHEESECAKE FILLING
I prefer a handheld beater for the filling – it’s easier to move around the bowl and needs less scraping. If using a stand mixer, use the whisk for cream, then switch to the paddle for cream cheese to avoid over-aerating (which can cause unsightly bubbles in the filling).
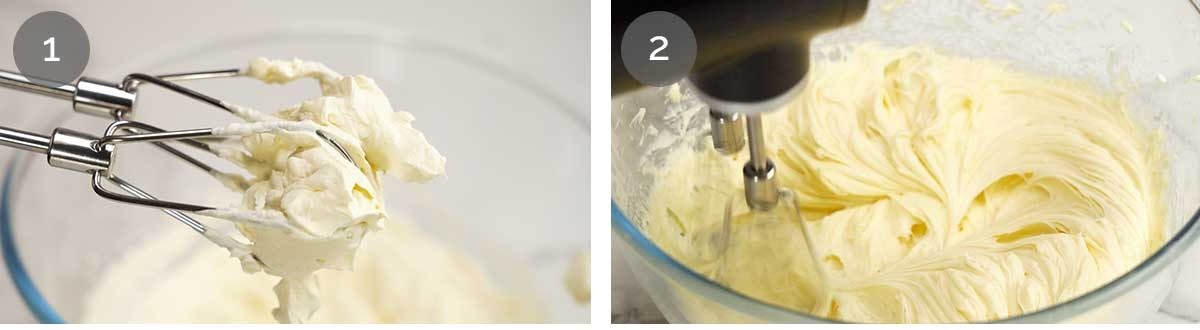
Whip cream – Whip the cream on high for 2 – 3 minutes or until stiff peaks form (upright Santa hats, not floppy elf hats!). We want properly stiff cream to make the cheesecake light.
I whip the cream first so I can use the same beaters for the cream cheese without washing. Do it the other way around and you’ll need to clean them, as cream can be fussy about whipping!
Beat cream cheese – Put the cream cheese, vanilla and sugar in a separate bowl and using the same whisk (no need to clean it), beat for 2 minute on high just until it’s softly smooth, then stop. We don’t want to beat excessively to aerate it as this will create unsightly air bubbles in the filling and increase volume too much – your cheesecake will overflow!
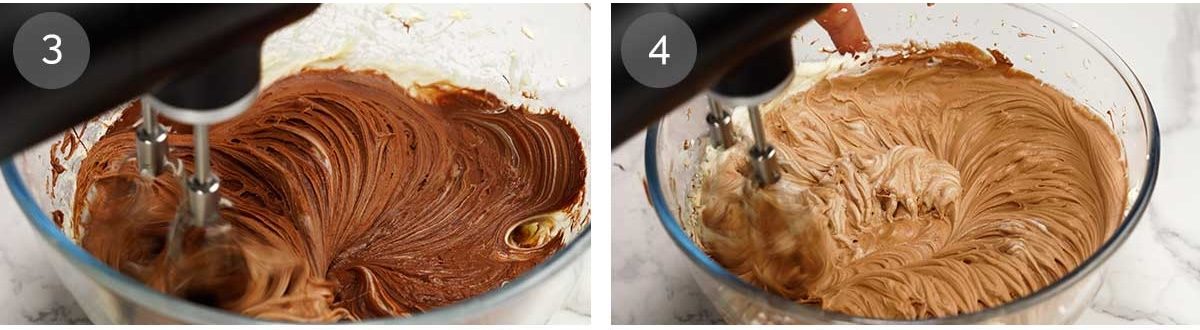
Make it chocolate! Pour in the cocoa powder water mixture and the cooled melted chocolate, and beat it in until incorporated.
Beat in whipped cream – Put 1/3 of the whipped cream in, and beat until you can no longer see cream streaks. Then add the rest of the whipped cream in and beat again until you no longer see white cream streaks. Run a rubber spatula around the edge and base of the bowl to ensure it’s all properly mixed together and a uniform pale chocolate colour.
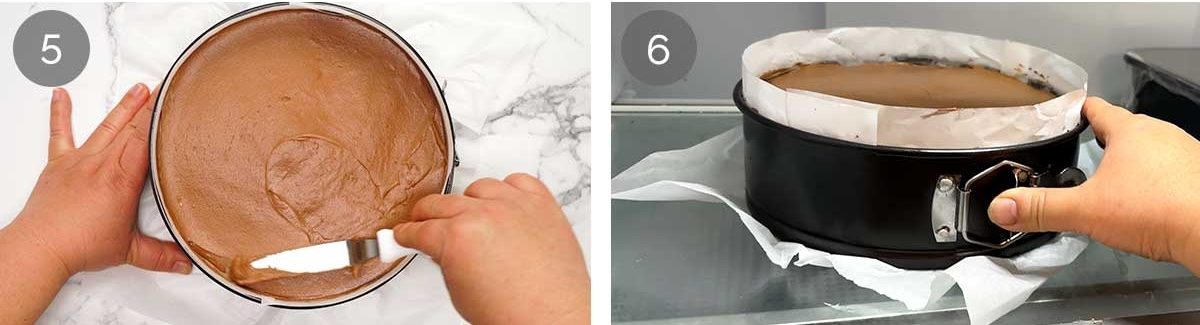
Pour the filling into the base then smooth the surface (a small offset spatula is handy for this).
Refrigerate 2 hours to let the surface firm up sufficiently to pour the ganache on.
5. DECORATING THE CHEESECAKE
The cheesecake is finished with chocolate ganache, whipped cream and chocolate shavings. You can skip the cream and shavings, but not the ganache – it’s part of the cheesecake and adds an extra hit of chocolate!
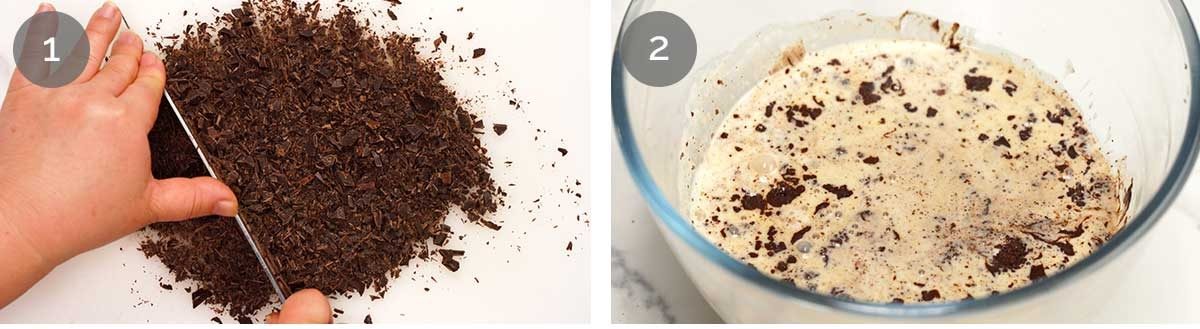
Chop chocolate for ganache – Whether using a chocolate block, melts or discs, chop the chocolate up finely to ensure it melts fully. This is especially important for this recipe because we are not making a large amount of ganache so there’s only a small amount of cream from which the heat is used to melt the chocolate.
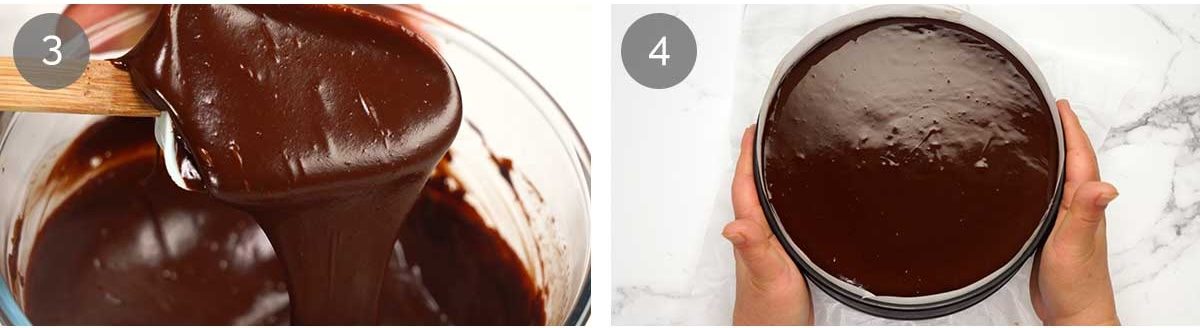
Hot cream – Heat the cream until hot but don’t let it come to a boil, then pour it over the finely chopped chocolate in a bowl. Then leave it, uncovered, for 5 minutes to let the hot cream melt the chocolate.
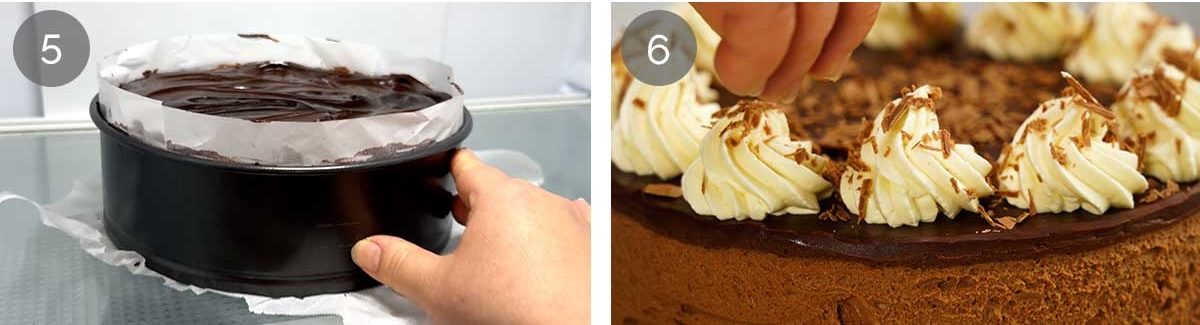
Mix with a rubber spatula until the cream and chocolate come together into a smooth ganache.
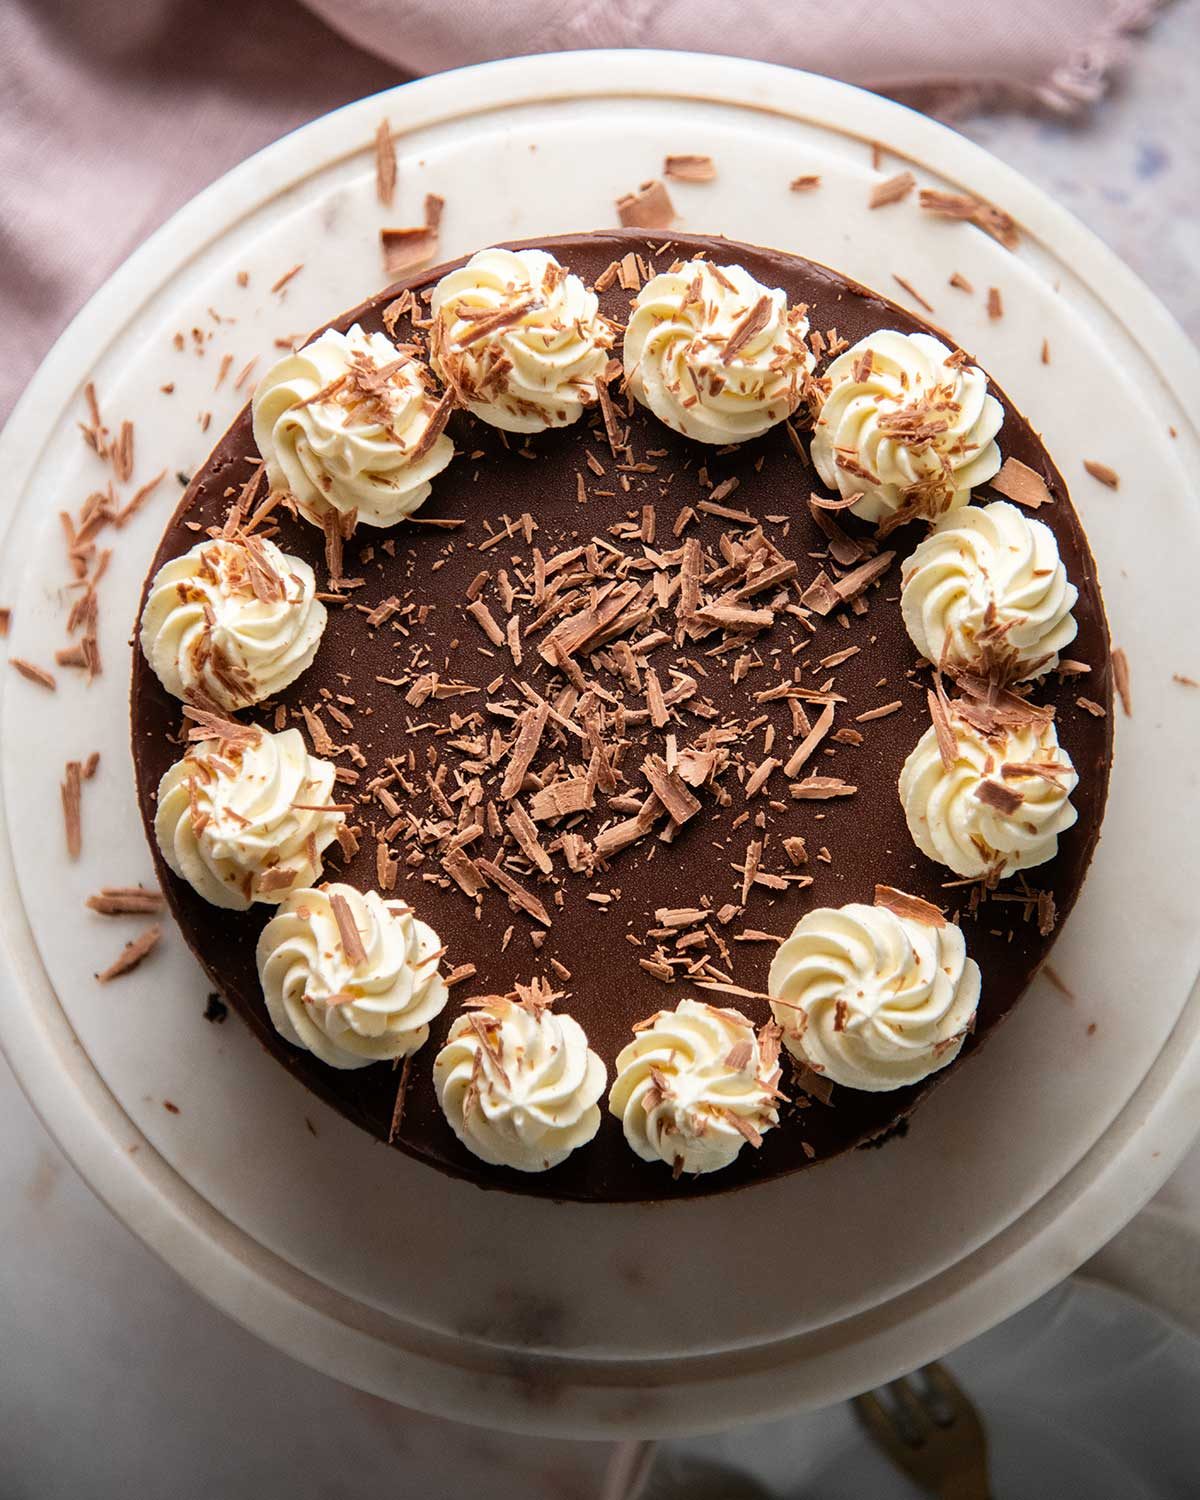
Ganache topping – Pour the chocolate ganache onto the surface, then rotate the cheesecake to make the ganache spread evenly all over.
Refrigerate 6 hours to let the cheesecake fully set.
Decorating – Pipe whipped cream around the rim and decorate with chocolate shavings. I just make chocolate shavings using a vegetable peeler on a bar of milk chocolate (milk chocolate is softer so it shaves and curls more easily than dark chocolate). I like using the chocolate shavings as it hides any imperfections on the surface of the ganache (little bubbles) and just generally makes the cake more enticing and chocolatey!
TIP: If you want to pipe the cream on the day before, then use stabilised whipped cream – see here for various ways to do it (easiest is to buy McKenzie’s whipped cream stabiliser, it’s a powder, just add to cream and whip). I almost always stabilise my whipped cream these days so it doesn’t weep and stays perfectly fluffy for days.

This Chocolate Cheesecake will keep for 5 days in the fridge, though the chocolate base does start to soften on days 3 and beyond. It’s not suitable for freezing because it weeps too much – you can really only freeze baked cheesecakes.
One last piece of advise with this cheesecake: It is best served at a gathering so there’s none left. Knowing there’s Chocolate Cheesecake lurking in the fridge is dangerous stuff. Midnight fridge raids! – Nagi x
Chocolate Cheesecake FAQ
This will keep for 5 days in the fridge though the biscuit base does start to soften on day 3. It will technically keep longer (subject to the shelf life of the dairy you used) but I find the base gets a little too soft for my liking the longer it is kept.
Tip for making ahead – If you want to pipe the cream on the day before, then use stabilised whipped cream – see here for various ways to do it (easiest is to buy McKenzie’s whipped cream stabiliser, it’s a powder, just add to cream and whip).
This cheesecake isn’t suitable for freezing unfortunately because it is not baked. (Baked cheesecakes freeze fabulously).
Yes, just use gluten-free chocolate biscuits for the base, and be sure the chocolate is gluten-free. Chocolate is naturally gluten-free but some might have gluten-containing ingredients added, or be made in a factory that makes gluten products.
Yes, if you want it to set and slice like you see in the photos and video. Dark chocolate (US: semi-sweet chocolate) has a lower cocoa % of around 40 – 45%, so it is a softer chocolate and therefore makes the cheesecake set more softly. The chocolate flavour is also not as strong so the cheesecake doesn’t have as intense a chocolate flavour.
Having said that, even made with dark chocolate, this cheesecake is just sliceable, it’s almost like cutting a chocolate mousse. The filling is even more creamy and it is very enjoyable to eat, though the chocolate flavour is not quite as strong.
Yes but you need to alter the recipe, see recipe notes.
Cream cheese in block form is firmer, whereas cream cheese in tubs is designed for spreading on things like bagels. I understand in the UK and some parts of Europe, block cream cheese is difficult to find so I specifically tried this recipe with cream cheese in tubs. It works, but you need to omit the cream from the filling and beat the cream cheese for longer. The cheesecake is not quite the same height, but the chocolate flavour is more intense and the texture is a little more luxurious. It was so good, I almost flipped to that as the base recipe! 🙂
A really good chocolate cheesecake has evaded me for years. Given that 99% of the recipes I’ve come across are baked, I had it in my head that baked was surely the best way to make it.
I’ve made a few over the years. They were fine. But none had me jumping up and down with excitement (really, when something is that good, I still do!).
Until that day I had a sudden, slightly unhinged urge to make a baked and no-bake version side by side, just to compare, because I had to know. And what a revelation! The no-bake version had a better, purer chocolate flavour, and I realised I didn’t even need gelatine to make it set. Chocolate firms up as it cools, so it does the setting job all by itself!
And just like that, after years of chasing the perfect chocolate cheesecake, I had my answer. Don’t bake. Don’t use gelatine! 🎉
I did try with gelatine though, because I had to know. And the cheesecake set unpleasantly firmly. This recipe I’m sharing is made with 70% chocolate which sets more firmly than chocolate with a lower cocoa, like dark chocolate (US: semi-sweet chocolate), and with 70% you don’t need gelatine.
If I were to make this recipe with dark chocolate, I would use a bit of gelatine because it sets a little too soft for my liking when made with dark chocolate. I’m not sure exactly how much, I’d have to try it out. Definitely not the full amount used in my No bake cheesecake because that’s what I tried and it was way too firm.
The other thing I grappled with when pushing it across the finish line was getting enough chocolate flavour into it. Using just chocolate was tricky because the more you use, the firmer the cheesecake sets. Also, it seemed obscene to use 300g/10oz of chocolate? 😅
Instead, I used a combination of cocoa and chocolate, and by blooming the cocoa in a little hot water to bring the chocolate flavour out, it gave the cheesecake a really great chocolate flavour.
I think, all up, the team and I probably made it 12 times? Including the recipe video. I feel like it was one of those recipes were the first attempt was 90% of the way there, then it took another 10 goes to make it exactly was I wanted. That last 10% is always so painful!!
Watch how to make it
Hungry for more? Subscribe to my newsletter and follow along on Facebook, Pinterest and Instagram for all of the latest updates.
Rich Chocolate Cheesecake
Ingredients
Base:
- 140g / 4.9 oz Oreo cookies – WITH the cream filling! (14 oreos, 1 standard Australian sleeve, Note 1)
- 50g / 3 tbsp unsalted butter , melted
Chocolate cheesecake filling:
- 200g (6.5 oz) 70% cocoa chocolate for baking , pretty finely chopped if using block chocolate (Note 2)
- 2 tbsp cocoa powder , no need to sift
- 2 1/2 tbsp boiling hot water , for blooming cocoa
- 1 cup thickened cream / heavy cream or a full-fat whipping cream, fridge cold
- 500g / 1 lb cream cheese , softened (block form, Note 3)
- 1 cup caster sugar / superfine sugar (Note 4)
- 1 tsp vanilla extract
Ganache layer
- 1/2 cup thickened cream / heavy cream , or pure cream 35 – 40% fat (Note 5)
- 75 g (2.7 oz) 70% cocoa chocolate for baking finely chopped whether using block, buttons, callets or chips (Note 2)
Whipped cream piping
- 1 cup thickened cream / heavy cream , fridge cold (for whipping)
- 1 tbsp caster sugar / superfine sugar
- 1/4 tsp vanilla extract
Chocolate shavings (optional)
- Any milk chocolate bar , or leftover 70% or dark chocolate, shaved using a vegetable peeler (Note 2)
Instructions
- Inverted pan base – Flip the base of a 20cm / 8" springform pan upside down – this makes it easier to remove the finished cheesecake without the lip in the way. Very lightly butter the pan base, then press on a square sheet of baking paper. Clip the pan sides onto the base, letting the excess paper stick out the sides (for easy removal later).
- Line with high sides – Butter and line the pan sides with more baking paper, making them about 1cm / 0.4" higher than the rim. (Note 6)
Oreo biscuit base:
- Blitz cookies – Roughly break up Oreos with hands and place in food processor. Blitz until they become fine crumbs. Add melted butter, then blitz again until combined.
- Press into pan – Transfer crumbs into prepared pan, pressing evenly and firmly on to the base only (I use the underside of a straight-sided, flat-bottomed cup measure to do this).
Cheesecake filling preparation:
- Melt chocolate – Put the chopped chocolate into a heatproof bowl and microwave in 20 second increments, stirring in between, until melted and smooth. Set aside to cool for 5 minutes so it is lukewarm but still fluid. If it's hot, it will melt the whipped cream and deflate the filling.
- Bloom cocoa – Whisk the cocoa and the hot water until smooth. This makes the flavour of the cocoa bloom! Set aside.
Make the cheesecake filling:
- Whip the cream until stiff peaks form (2 – 3 minutes on high). Goal: upright Santa hats, not floppy elf hats!
- Whip cream cheese – In a separate large bowl (no need to clean the beaters), beat the cream cheese and sugar for 2 minutes on high until fluffy and smooth.
- Add vanilla and beat just to mix it through.
- Make it chocolate! Add melted chocolate and bloomed cocoa, beat until it is mixed through, stopping to scrape down the sides of the bowl as needed.
- Fold/beat in cream – Add one third of the whipped cream to the cream cheese mixture and beat it through just until combined. Then add the rest of the cream and use the beater to mix it in until you can no longer see streaks of cream.
- Pour into cake pan – Pour the mixture onto the Oreo crust base and smooth the surface.
- Fridge 6 hours & ganache – Transfer to the fridge for at least 2 hours. Then pour over the ganache (directions below) and spread evenly over the surface (rotate pan to spread). Then refrigerate for another 6 hours+ to let the cheesecake fully set. (Note 7)
Decorating
- Remove cheesecake – Release the sides of the springform pan. Use the paper to slide the cheesecake off the base onto a serving platter. Peel the paper off the sides, then slide the paper out from under the cake.
- Whip cream – Place the cream, sugar and vanilla in a bowl. Beat on high for 2 minutes until softly whipped. (See here for make-ahead stabilised whipped cream option – Note 8). Then pipe swirls around the border and sprinkle all over with shaved chocolate, if using.
- Serve – Cut the cheesecake into slices and serve, fridge cold! An extra dollop of whipped cream on the side would never go astray.
Ganache
- Heat cream until hot but not boiling. Pour over finely chopped chocolate, leave 5 min, stir until smooth. Bang to remove bubbles. Pour over cheesecake.
Recipe Notes:
Nutrition Information:
Life of Jaffle
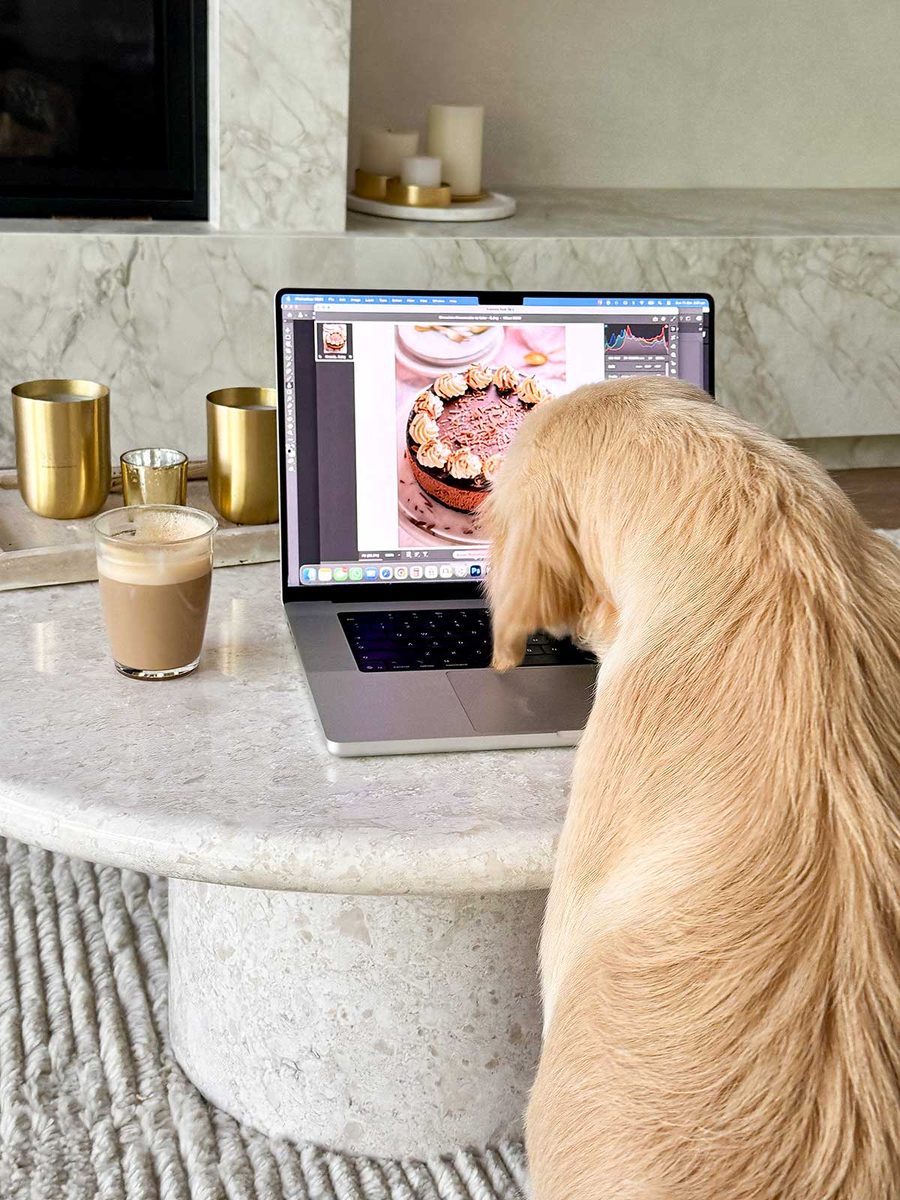
These days, I do a lot of work sitting on the floor because a certain fur ball is just so interested in whatever I’m doing. 😆 Here he is, closely studying the chocolate cheesecake. I don’t have the heart to tell him he will go his whole life without knowing what chocolate tastes like!!
I use lindt intense chocolate to make an artery hardening but tasty fudge. The orange and raspberry are really good and I reckon either would work in this. I see no reason throwing some crushed roasted hazelnuts into the ganash or the cheesecake. 😉
Hi Nagi and JB
Could I use a mixture if Philadelphia cream cheese and Mascarpone to create the right fat content as its impossible to get block cream cheese here in the UK?
G’day Nagi,
Do you think I could use the chocolate mirror glaze on this cheesecake? It would look spectacular.
Hi Cathy! You absolutely could but for a clean finish, you’d need to make sure the surface of the cheesecake is 100% smooth before pouring it on as mirror glazes show every imperfection 🙂 I’d let the filling set per the recipe, put the cake pan on a spinner then use a small offset spatula to smooth the surface and make it as perfectly flat as possible (like you would prepare a buttercream frosting base before pouring mirror glaze on). If you want to be really meticulous, you could take it out of the cake pan then smooth the sides too. You wo’t be able to smooth the side of the base, but I’d probably just hide that with a thin band of chocolate shavings, or do a retro band of piped whipped cream! (Sorry for overload, I just can’t help myself 😆) – N x
Looks great.
Can I use a cake base for this as in an almond meal, instead?
Hi Tracy! I think you’ll find a cake base doesn’t have enough structure to hold up the cheesecake, I think it will just disintegrate, sadly 🙂 Sorry to disappoint!
Suspicions confirmed!
Thank you.
Could you use allulose in this recipe instead of the caster sugar. It is super powdery but not as sweet.
Hi Susan! I haven’t tried but I feel it should work just fine given this is not baked 🙂 – N x
Yes I Do Please
Looks delicious! Just wondering. . . here in the states we use chocolate graham crackers for this sort of dessert. Do you have these in Australia? Recipe suggestion? BTW Love Jaffle❤️🐾
I haven’t seen them in stores but I have had them in the states!! You can absolutely use them for this cheesecake 🙂 – N xx
This looks totally evil. I’ll need some friends around to help consume it.
Do you think I could blend the cocoa with scotch rather than hot water? I always do that when mixing cocoa to drink.
If you do, can I come join the party? 🙂 (Just warm the scotch so it blooms the cocoa, and careful with the fumes!!)
Your email said people always have trouble when you create recipes using gelatine (which this one doesn’t). I’m not trying to be cheeky, but what is the problem? Is it because some gelatine isn’t vegetarian? Or do they find it hard to use, or what?
Hi Judy! It’s not that people have trouble if they actually go ahead and decide to use it – in fact, the reader reviews on the gelatine-based no bake cheesecakes are phenomenal. I think people just get turned off if they see gelatine in an ingredients list so they don’t try the recipe. It’s just not something that everyone is comfortable with because it’s an unfamiliar ingredient I think 🙂 But in my experience, once people use it once, they never stop!! 🙂 – N x
Can you use baking chocolate? Looks delicious!
Yes that’s exactly what I call for! 70% cocoa baking chocolate 🙂 Confectionary aisle chocolate doesn’t melt properly – except Lindt, I find 🙂 – N xx
I might try this; it sounds very good. Is there a substitute for Oreo crust that has good flavor (Oreo doesn’t even taste like chocolate , ugh)
Trust Nagi, her recipes always work – also, if you read the opening article before the actual recipe, it says that any chocolate biscuits can be used.
Ever since the recent discontinuation of the Famous Chocolate Wafers that everybody on planet earth used to use since time immemorial for making chocolate crusts, the only substitutes have been to “use oreos” in their place. I have a recipe from the 80’s for a mousse pie with a chocolate crust and I bought the oreos, but the thought of using them has been stopping me from making it because it seems really unappealling as a sub. The Famous wafers were perfect – dark, rich, fudgy crisps that lent perfectly to the tasks required. I have looked high and low and oreos was all anyone has been able to find so far. I am not a fan of oreos. If anybody wants to start a chocolate wafer company with global promise, now is your chance! Zero competition! Unfortunately, for now, unless you go OFF a chocolate bottom, oreos has been the only sub so far. I would sub with ground Pecan Sandies cookies or an almond flour “graham cracker” crust, with or without the cinnamon. A Lot of people can relate to your predicament though!
I always use Arnott’s Chocolate Ripple biscuits for cheesecake bases and they work great. I’ve never used Oreos so can’t compare the two, but I assume as Nagi says, you’d need more butter for the Ripples because they have no filling.
You sure can Nancy! Any chocolate biscuit you want 🙂 – N x
I just love your recipes. Thank you for all your research and detailed comments. Wags and woofs from Canada
You’re so welcome Judy! I love the creation of part recipe development 🙂 Drives me bonkers when things don’t work but so satisfying when it does!! – N x
You are very welcome Judy! Thank you for your kind compliment!
Jaffle is probably thinking that that looks like a very delicious BEEF cake with mashed potato roses…and possibly a beefy/steak-y mashed filling that may also contain other delights (hints of sauteed onions or peas) 😉
BA HA HA! Or – he is just thinking “that looks edible, I don’t really care what it is as long as I can eat it”? 😆
Hi Nagi, I’d love to save this no bake chocolate cheesecake to my recipe tin but there’s no little heart icon to do so. Please can you advise another way to save it?
I love your recipes & easy going style of explanation, please never change. Many thanks Marion
I’ll look into this Marion, I hope it’s not broken! Thanks for flagging it – N x
Hi Marion, thank you for your compliment! The heart icon should be there, maybe it’s a glitch? or have you tried using a different browser?
Is it wrong to want this for my breakfast this morning 🤣?
Nagi so grateful for the extra effort you put into each recipe that makes it so much easier to serve my family food they love.
Jaffle looks like he is trying to teleport the cheesecake.
Not at all Nancy! In fact, it’s better for us to have cake for breakfast than after dinner just before we go to bed isn’t it? We have ALL DAY to burn it off 😇
Absolutely nothing wrong with that Nancy! Sounds pretty normal to me 😂
Did you leave the cream filling in the Oreos before blitzing them in the food processor, or scrape it off? I can’t tell from the picture and you don’t mention it.
In the video, you can clearly see the filling is still in the cookies. Hope you make it!
Hi Barb, yes it says in the ingredients to leave the cream in the biscuit.
Good luck. 😋
Yes! I have added a note to make this clear, thanks for the question Barb 🙂 – N x
Hi Barb, yes you can leave it, it’s mentioned in the recipe card. 🙂
Could I bloom the cocoa in coffee (made with the hot water and espresso powder) to make it a mocha cheesecake?
Hi Kate! I am not sure it will add enough coffee flavour unless you make it super super strong! I’d love to know if you give it a go though! – N x
I am getting organised for Christmas. I went to your recipe for porchetta, and of course it is Dozer’s last recipe as Foodmeister. I have pet anniversaries at this time of year too. I am always attracted to people who have dogs, they are invariably lovely people. And it’s a bonus if they can cook! Bless you, Nagi: you are one in a million.
Much love, AM.
Ohhhhh!!! The Porchetta is PERFECT for Christmas!! 🙂 – N xx
Thank you for your lovely message Anne-marie and for making porchetta for Christmas! Dozer is still very much missed ♥️
I like your recipes, the only thing is that certain items are unobtainable in the U.K. or called differently e . g. Corn starcn (which I substitute for cornflour) and I have to keep on substituting cups for grams and millilitres
There’s a button at the top of the recipe to switch between metric and imperial systems so you don’t have to struggle!
Hi there Ann just thought I’d help you and say that yes you are using the correct product in cornflour, it’s just another name for cornstarch. We in nZ call it cornflour. Happy Christmas.
Hi Ann! Usually I write cornflour / cornstarch, sorry if I missed it somewhere! 🙂 And if you flick the Metric button you will get the measurements in grams and mls! – N x
Hi Ann, cornstarch and cornflour are exactly the same thing, just different names depending on where you live. Also, there’s a handy “metric” button just above the ingredients list in all our recipes. Click it and the measurements will switch from cups to grams and millilitres. Hope that helps!
This looks like a perfect addition to the Christmas menu. Don’t have to turn on the oven if it’s 40°, and it can be made ahead of time. Win win!
Yes it can definitely a life saver in some parts of the world 🙂 Thanks Christine!
YES! Should I do a white Christmas edition? 🙂